Cold Joins.
Hi Reggie,
“Each plaster coat shall be applied to an entire wall or ceiling panel without interruption to avoid cold joints and abrupt changes in the uniform appearance of succeeding coats. Wet plaster shall abut set plaster at naturally occurring interruptions in the plane of the plaster, such as corner angles, rustications, openings, and control joints where this is possible."
"Joinings, where necessary, shall be cut square and straight and not less than 6 in. (152 mm) away from a joining in the preceding coat."
.I'm not clear on what it is saying in the red text...
Can you provide a practical interpretation?
The red text says if you leave a join in the brown coat, do not leave a join in the finish coat in the same place, If necessary to leave a join in the finish, leave it at least 6 inches away from the join in the brown coat.
A join always shows, in the finish coat, and a join in the brown coat will show through the finish coat as a hump. It is always best to plan work to start applying finish early in the morning, making sure preparations are made the day in advance.
I have a great secret below for leaving a join in the finish coat when necessary. In this case, we had a real big wall. These joins are inconspicuous.
I need to explain how to leave a join in the brown coat, but it is confusing without pictures. We haven't had to leave a join in the brown coat in years, so I haven't had an opportunity to take pictures. Sometimes you run out of day before you run out of wall.
If it is necessary to quit before the brown coat is finished on the wall, one can cut a join, sometimes known as edgeing in plastering. After the wall is rodded off, a line is cut with a trowel, and the mortar scraped off above the line. This provides an edge that is the wall thickness and a place to start and stop. I know this may be confusing, so I need to take a picture, but hopefully we won't have any joins for a while.
Even if a join is cut neatly, usually you can read the join in the finished wall. I know this doesn't sound logical, but it is true.
Here's how we make a join in the finish coat:
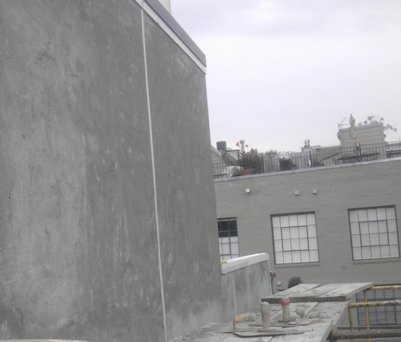
A mystic secret is revealed. This wall is too big for all of us to finish in one operation. Here's how we did it with no control joints. First, we put a strip of tape on the brown coat with a level.
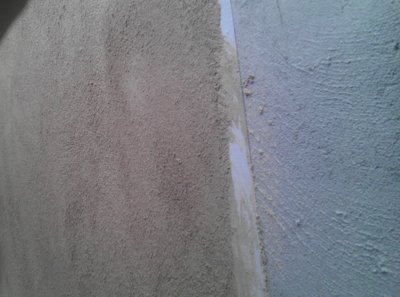
We finished and floated the first section, and pulled off the tape.
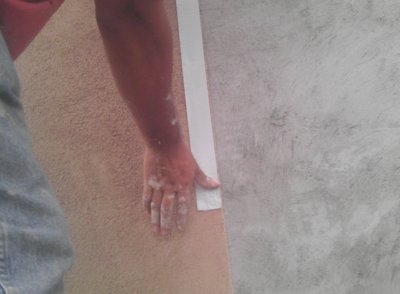
Next, we taped off the edge of the first section, and finished up to it.
Looks fine. You can't see the wall was really done in three sections unless you look real close.
The idea is to brown or finish the entire wall top to bottom, end to end in one operation. Usually when we brown a big wall, we plan to work late to avoid leaving a join. I say join instead of joint.
A join in the brown coat will read through the finish coat. The finish will hump out over the join. This has to do with the fact that the join is less porous than the rest of the wall.
Sometimes, you run out of day before you run out of wall, or it starts raining, etc. meaning a necessity to cut a join in the brown coat.
I prefer to make a jagged line in my join for the brown coat, because it is less conspicuous than a straight line. I have a good method of doing this. I need to take pictures next time I have to cut a join in the brown coat. I need to take pictures for clarity on how this is done, but the idea is not to leave a ragged hump.
What the red says is that if you leave a join the the brown coat, for example, between two windows, don't leave a join in the same place with the finish coat.
If you leave a join in the brown coat between the top corners of the windows, and must leave a join in the finish, leave the join between the bottom corners of the windows.
It isn't a good idea to leave joins in the scratch coat, either, particularly on block.