Stucco and the blind man
Chapter 11: Flashing.
Mainly roof flashing, but I want to touch on windows and other kinds of flashing.
This is important. There is so much poorly done flashing in the world, and bad flashing causes untold millions of dollars in damage and rot that can be avoided.
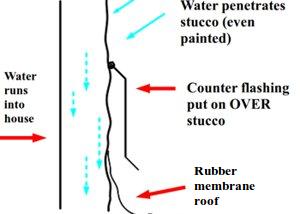
The number one thing I need to say and have said over and over is that flashing should go under the stucco and not over the stucco !!!
The reason is that water penetrates the stucco, even if it has been painted. Flashing over the stucco is a large source of our work, but the work would be completely unnecessary if the flashing was done well from the git go.
You may have seen this article I wrote about flashing rubber membrane roofs in January, 2012. Here's a link.
It is still the same idea for rubber membrane or other materials. The flashing goes under the stucco.
|

|
|
|
|
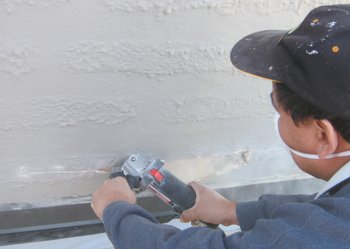
A new rubber membrane roof installation was leaking into the house right below the wall. Here, the stucco is cut back using a diamond blade. |
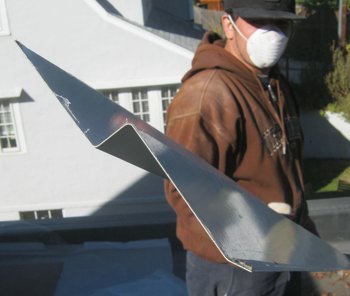
A side view of the new counter flashing with a flange and a stucco stop. |
|
|
|
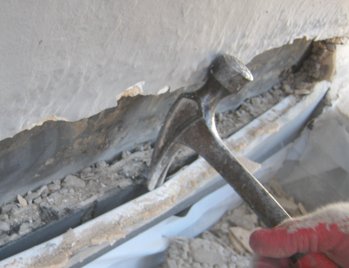
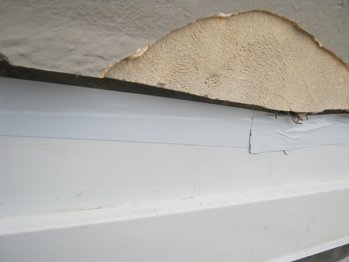
Removing the counter flashing showed why it failed. It didn't go back far enough to cover the stucco. Note a reglet, or groove, was cut into the stucco. REGLETS DON"T WORK FOR STUCCO. |
Our new counter flashing is put on and the top is sealed against the old tarpaper with tape. They make a sealer for this, also. |
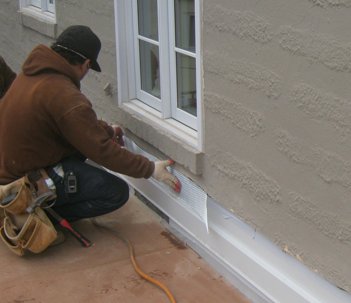
Metal lath is put on over the the flashing and filled in with mortar. |
Here are details on a job we recently finished in Reva, Virginia. The roof was leaking like crazy, because the flashing was over the stucco. We corrected the leak, and made a decorative band to hide the patch.
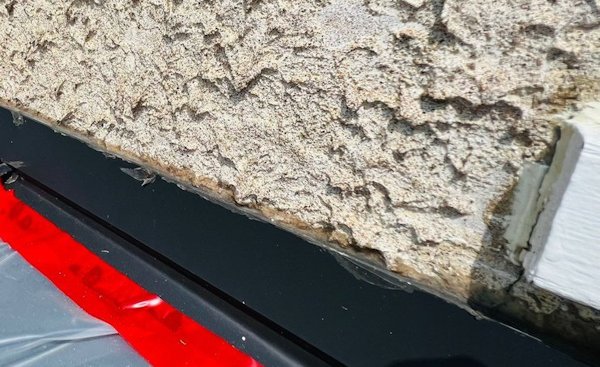
The counter flashing on this meatl roof went over the edge of the roof flange and over the stucco. The top of the flashing was glued on with caulk over the stucco. The stucco was very well done about 50 years ago. The challenge was the stucco was a natural color cement that is impossible to match.
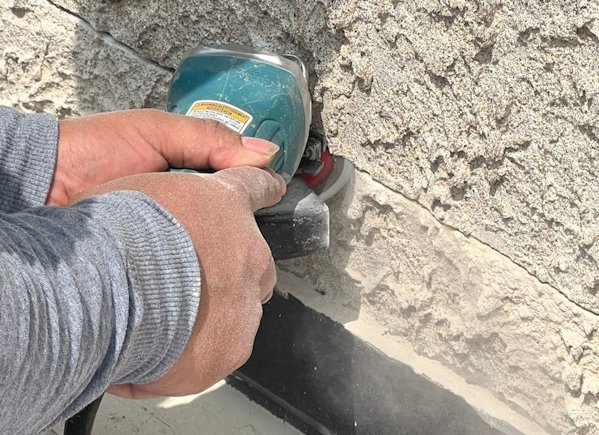
We pulled of the counter flashing. Here, the stucco is cut off above the roof flange with a diamond blade.
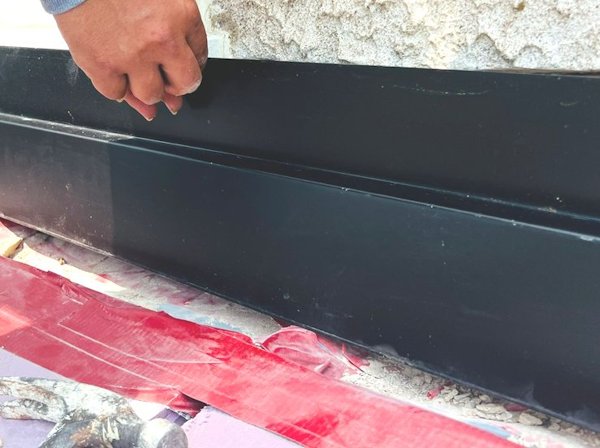
Our S flashing - also known as Z flashing is fit above the roof flange.
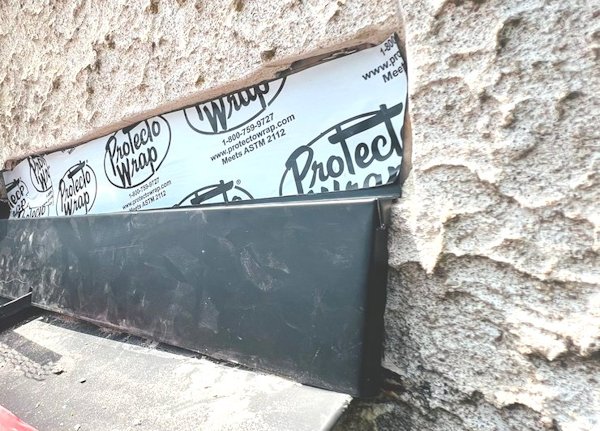
Top of our S flashing is sealed with protecto-wrap tape, and cut off as close to the bottom of the stucco as we can. Note how the end of our S flashing is cut and neatly folded into the wall.
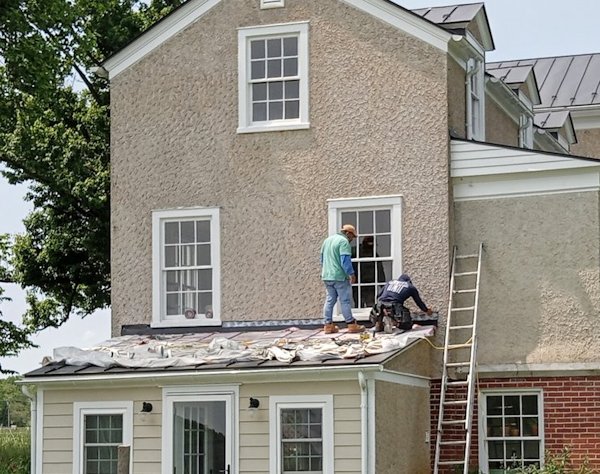
This is a big wall, and the stucco is very porous because it never has been painted. Every rain, the water absorbed into the stucco runs down and into the kitchen.

Metal roof is protected with styrofoam "scoreboard". The styrofoam is scored every 16 inches for score and snap. The 16 inch pieces fit perfectly in between the roof panels, that is, in between the standing seams.
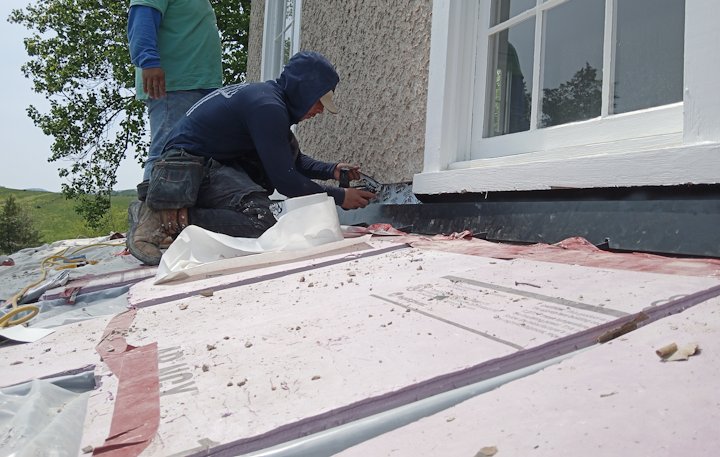
With a layer of plastic, and foam boards in place, one can walk freely on the metal roof without denting the roof or the seams.
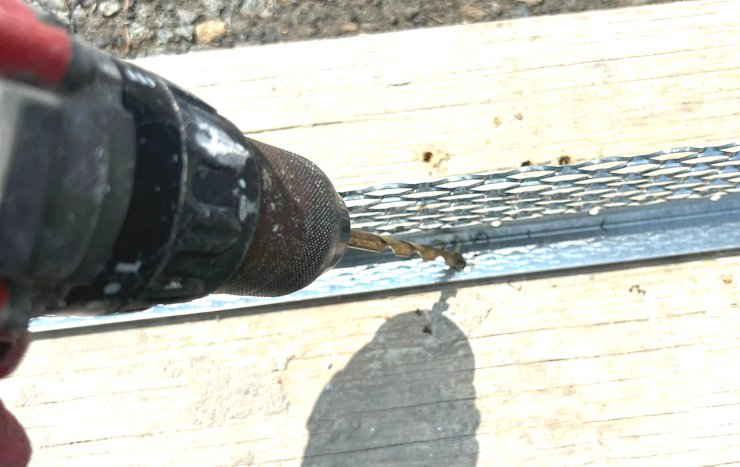
Plaster stop, or 3/4" casing bead is drilled with weep holes for drainage.
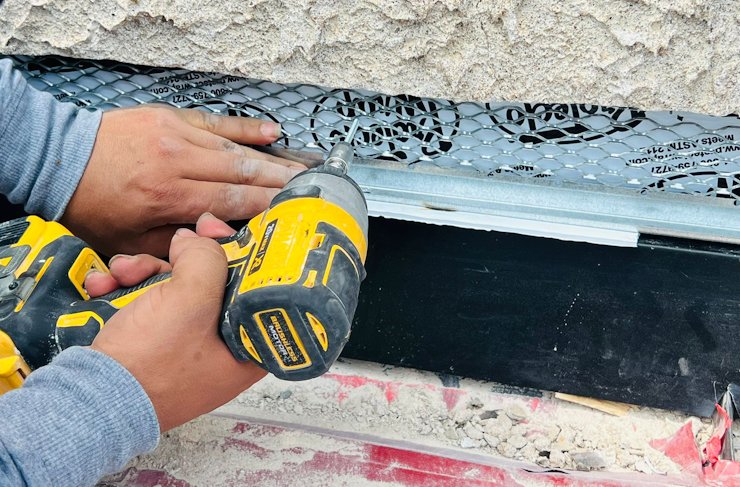
Stop is screwed in place. Note the 1/4" piece of correx used for a spacer between the bottom of the stop and the top of the flashing.
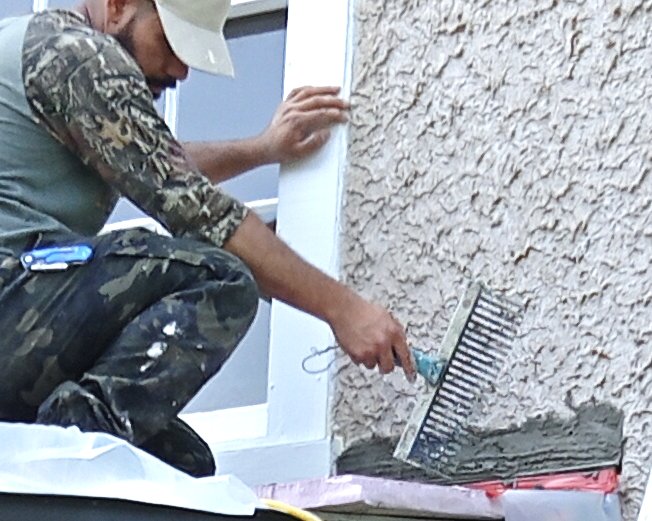
We filled in the gap and scarified the mortar and let it set overnight.
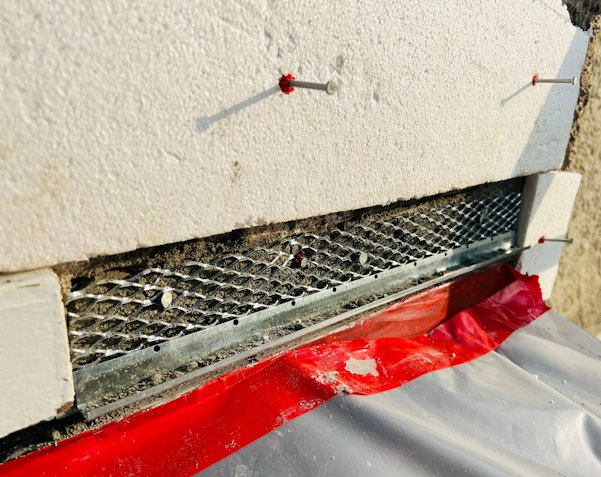
To make the bands, we put on another piece of my weep stop, and formed the band using 3/4" styrofoam.
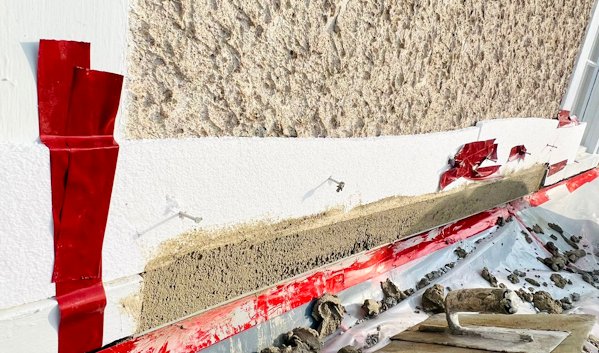
Forms are filled in using Rapid set mortar mix. This mortar sets super fast.
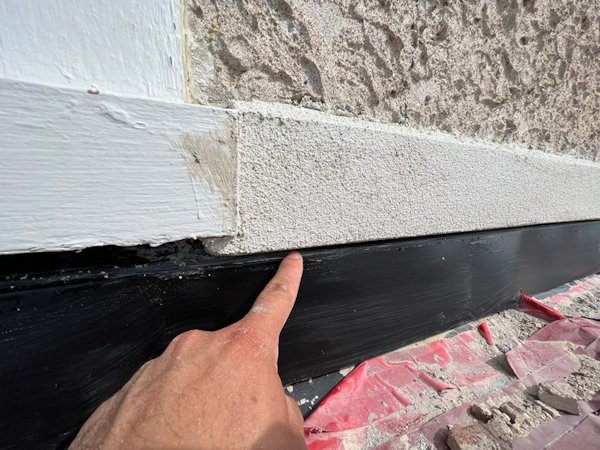
Our finish coat is white Portland cement and white sand. An angle is left on the top for good water run off. Note our wide drainage gap.
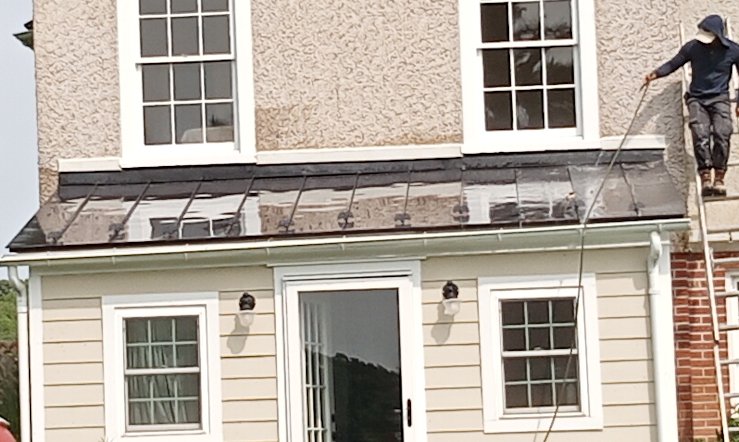
Decorative band hides the patch and looks like it has been there all along.
https://www.rtbullard.com/prog/progress158.htm questions/question1001.html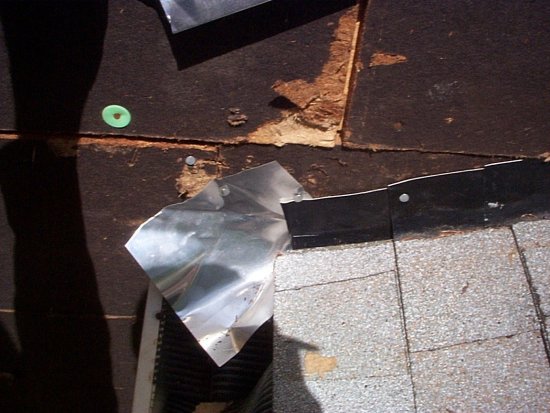
This kickout flashing looks sloppy, but it gets trimmed later. The kickout slides behind and under the step flashing. The kickout diverts water than runs down the edge of the roof into the gutter, if there is one, or away from the wall.
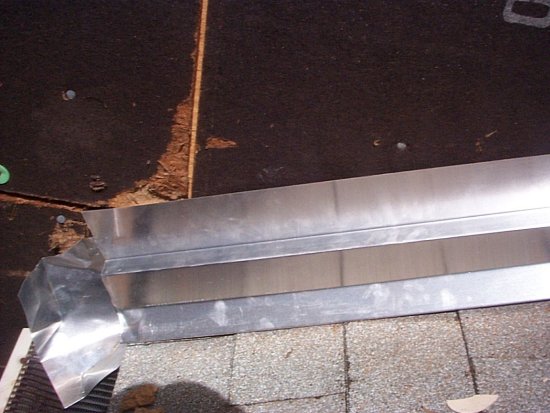
The counter flashing covers the step flashing. This kind of counter flashing is sometimes called stucco stop.
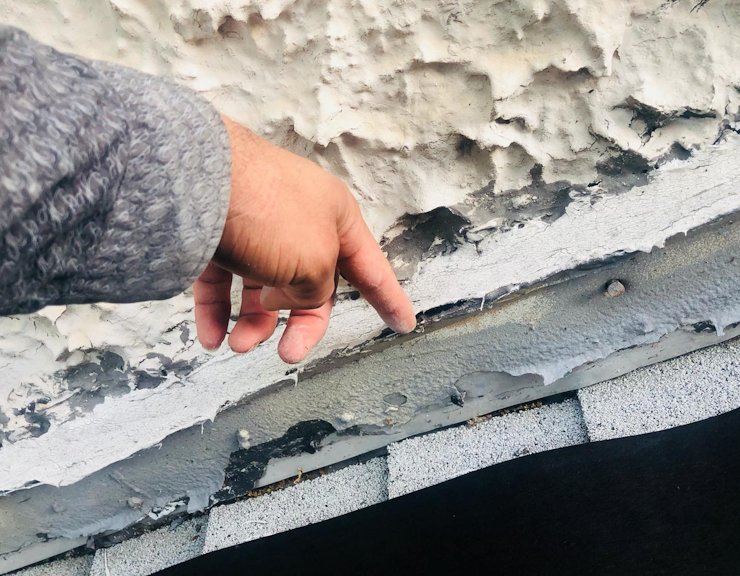
This roof leaks like crazy. The step flashing is covered with a counter flashing that goes on top of the stucco and has a gob of caulk on the edge. Caulking is probably the ugliest building material. A roof contractor said the shingles needed to be replaced.
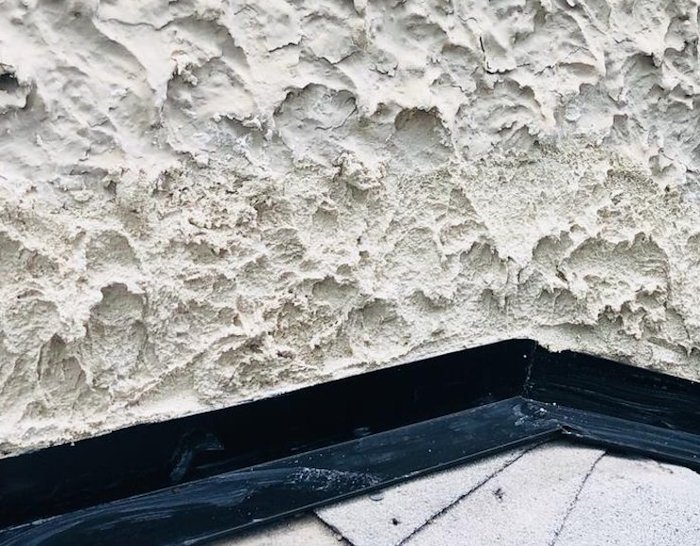
We cut the stucco off and put on a new counter flashing. We matched the bag texture really close. The wall can be painted to match later.
https://www.rtbullard.com/stucco-and-plaster-jobs/stucco-and-plaster-jobs-April-2023.htm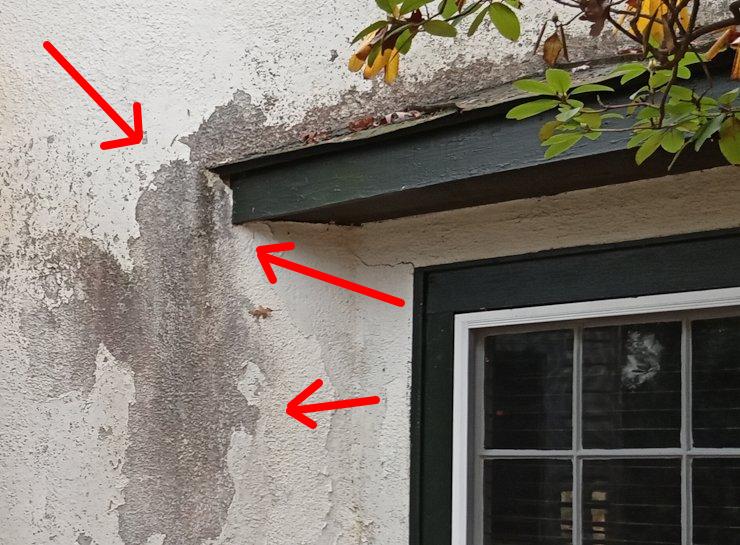
Besides the fact water was running into the house, you can see what the lack of a kickout flashing and a counter flashing does.
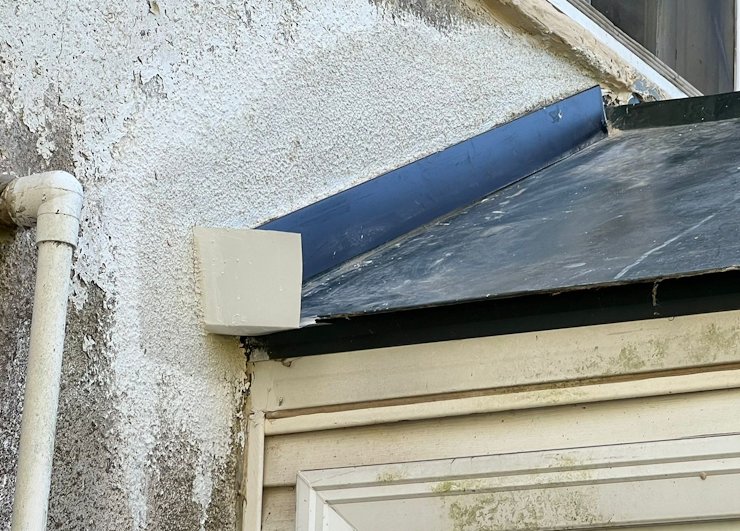
We cut off the stucco and put a S flashing over the roof flange and put on a kickout flashing. After the wall is painted, the patch will be inconspicuous.
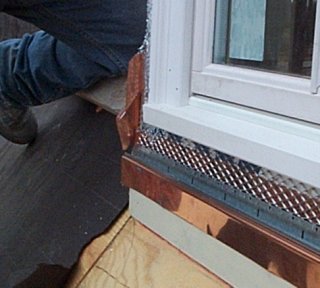
The counter flashing was put on first before the slate roof. Slates break easy, so the counter flashing is done first. A painted one by four is put on to support the S flashing. Later, the apron flashing and step flashings will be slid up behind. More about this project here:
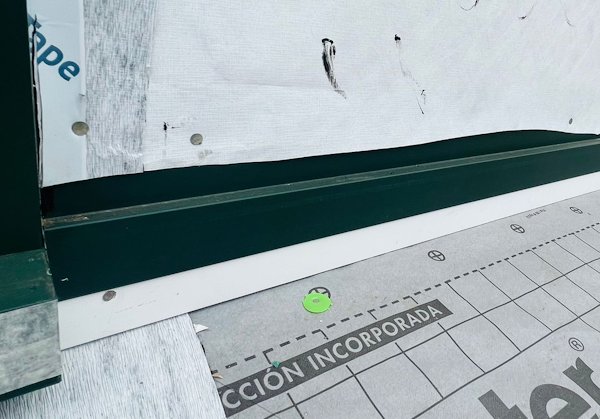
The addition we are working on now is done the same way. That way we can do the stucco without walking on the new aluminum roof.
More about flashing roofs first here:
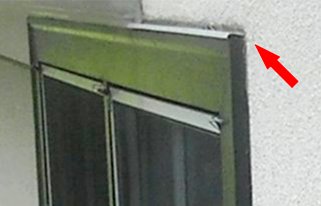
Similar approach, for a spanish tile roof:
|
|
|
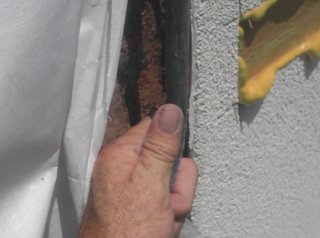
Flashing is angled backwards into the wall, instead of down away from the wall: |
Water runs behind wood trim and causes severe rot. The OSB sheathing is like wet oatmeal. More about backwards flashing here: |
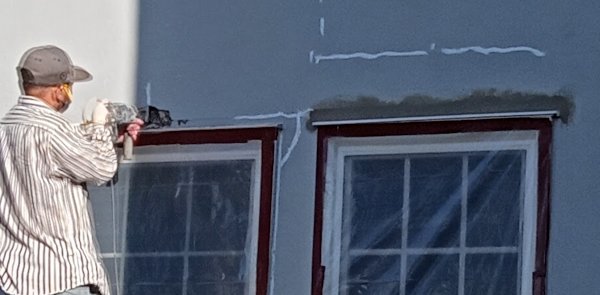
We fix a lot of leaky windows. The windows were replaced on this 150 year old house in Marshall, Virginia, and the flashing was done incorrectly.
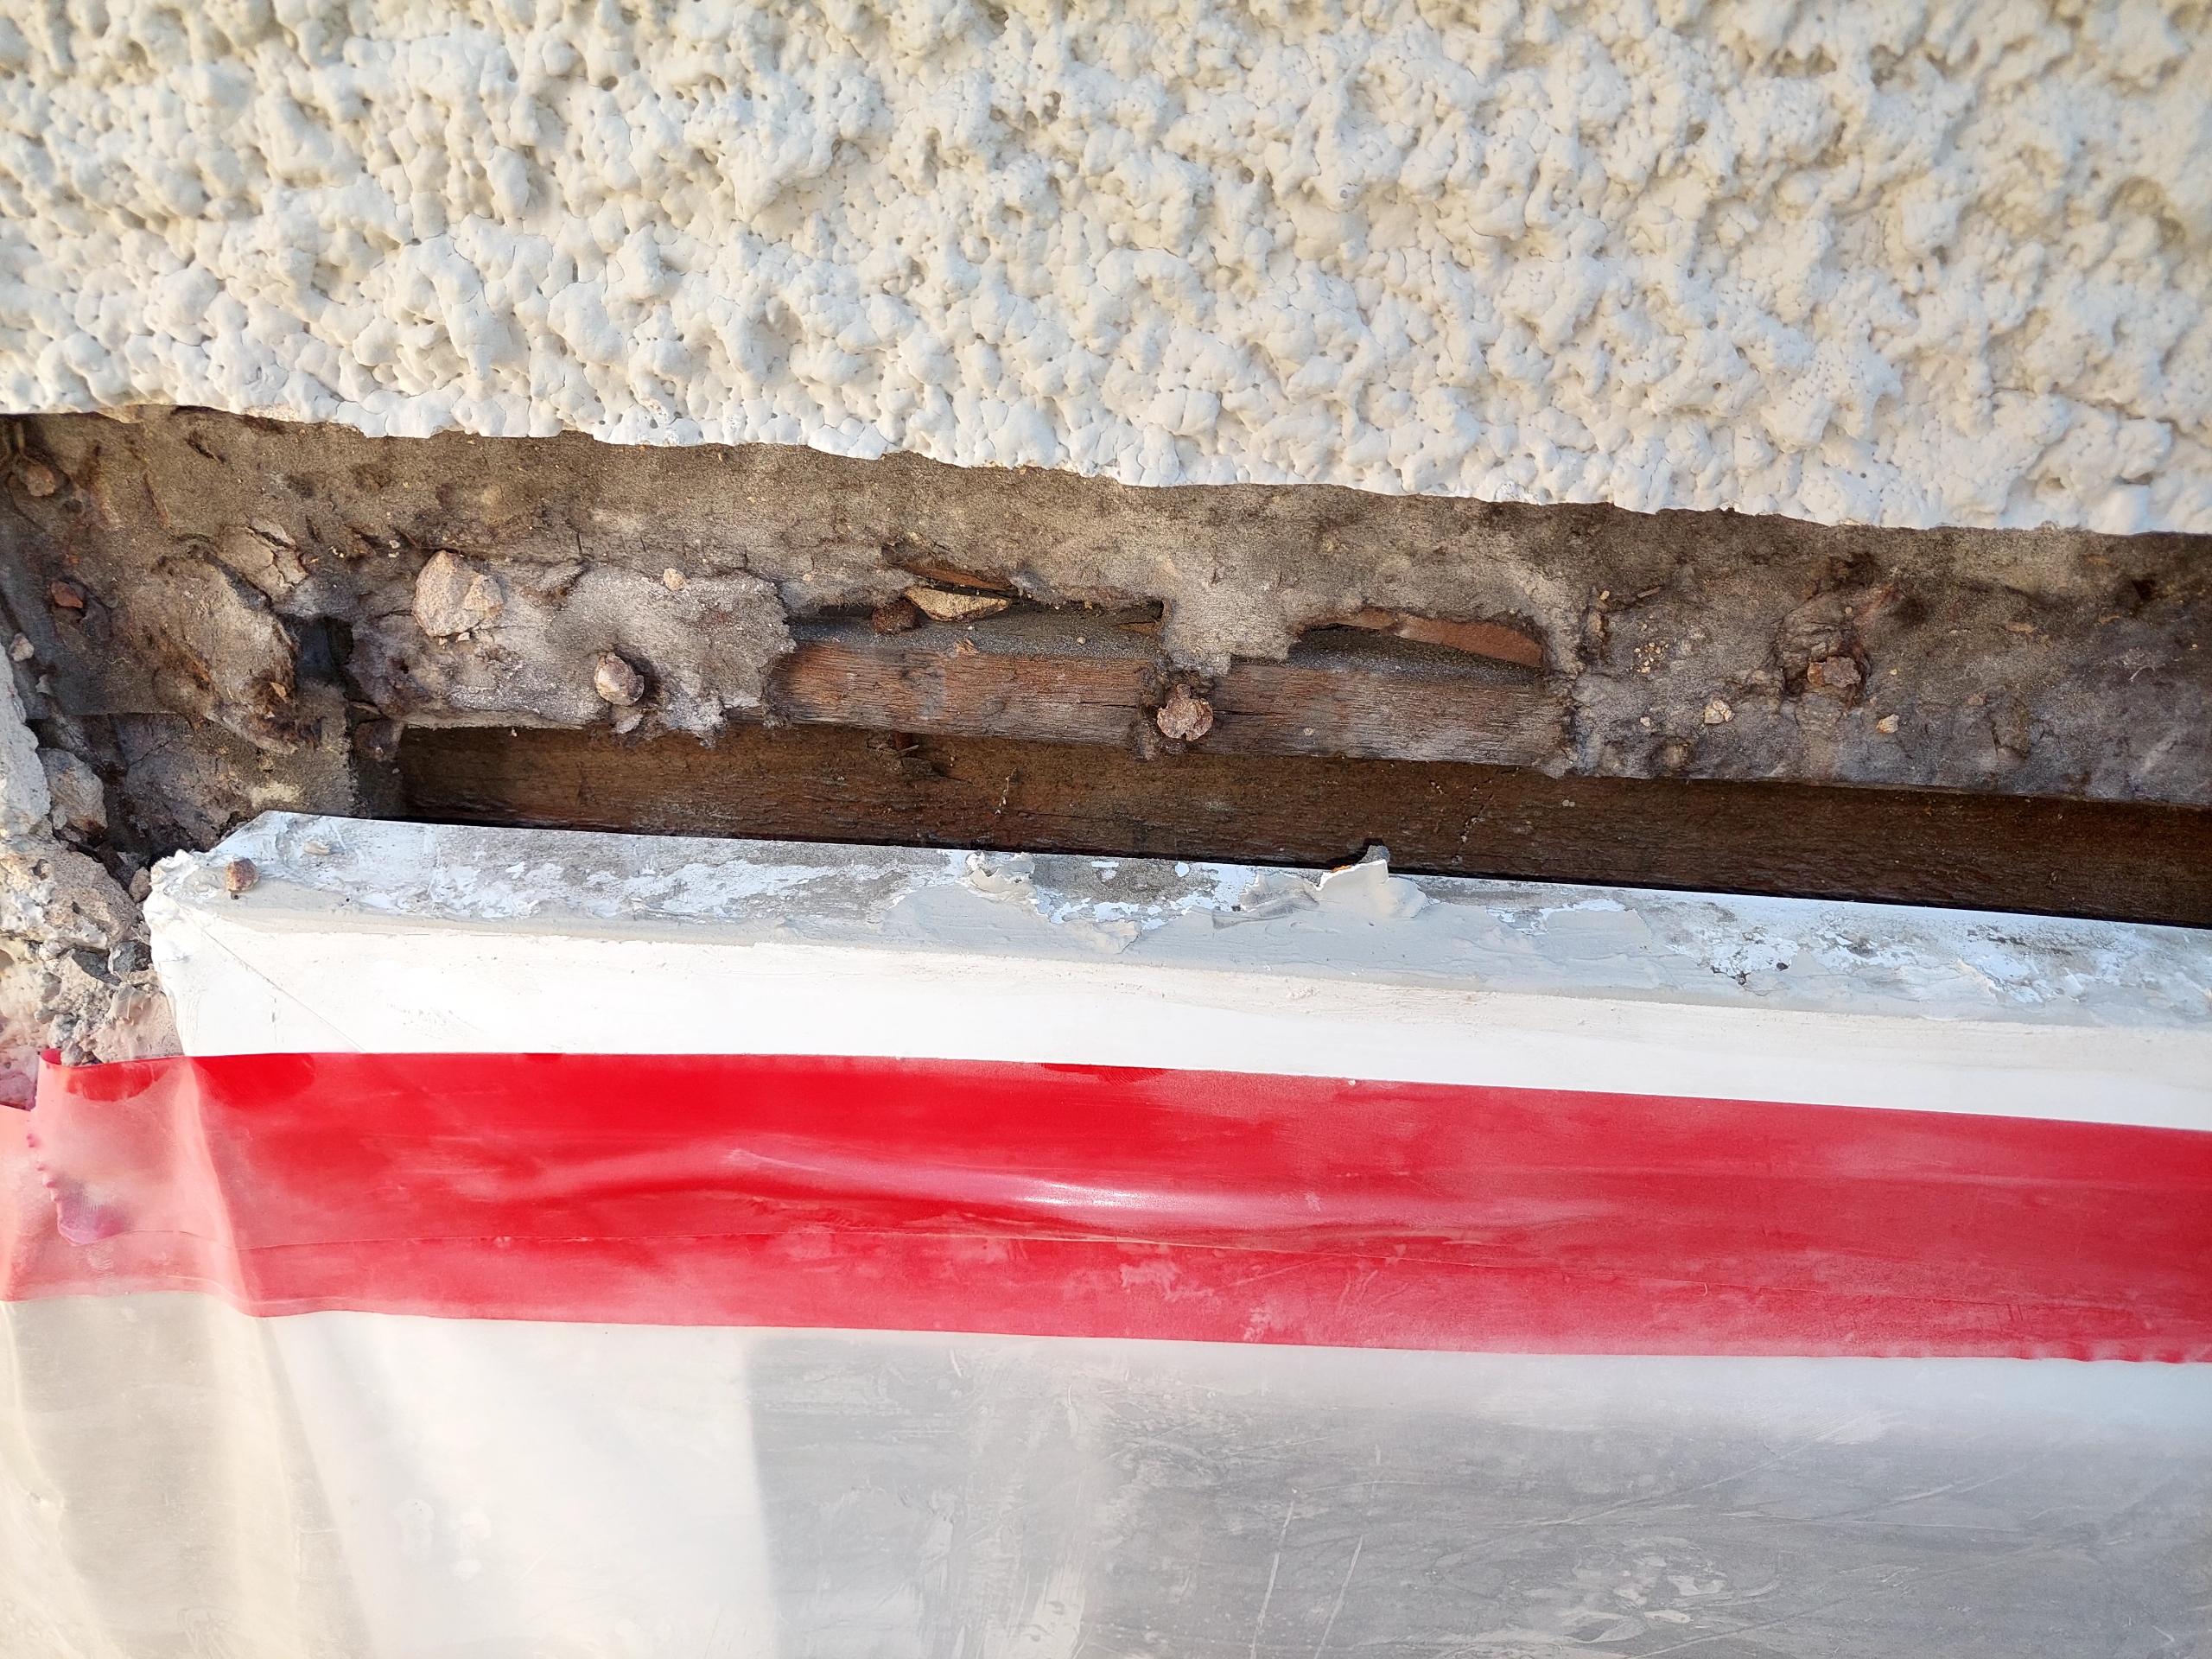
These new windows leaked real bad every time it rained in Richmond, Virginia. There was a huge hole behind the top of the window. Here's how we fixed it...
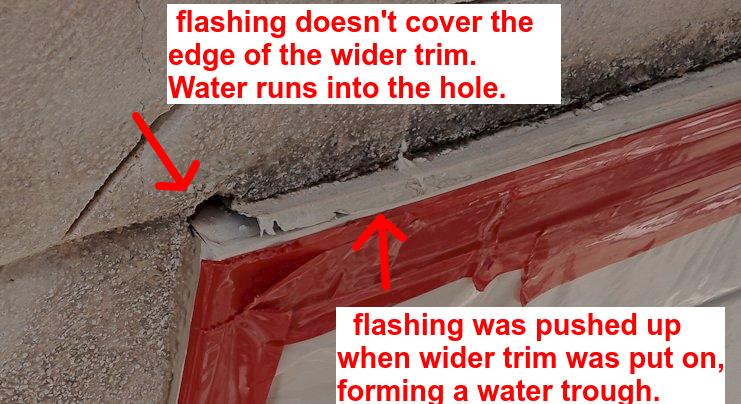
The people who replaced these windows used wider and taller trim, messing up the flashing we put on in 2001.
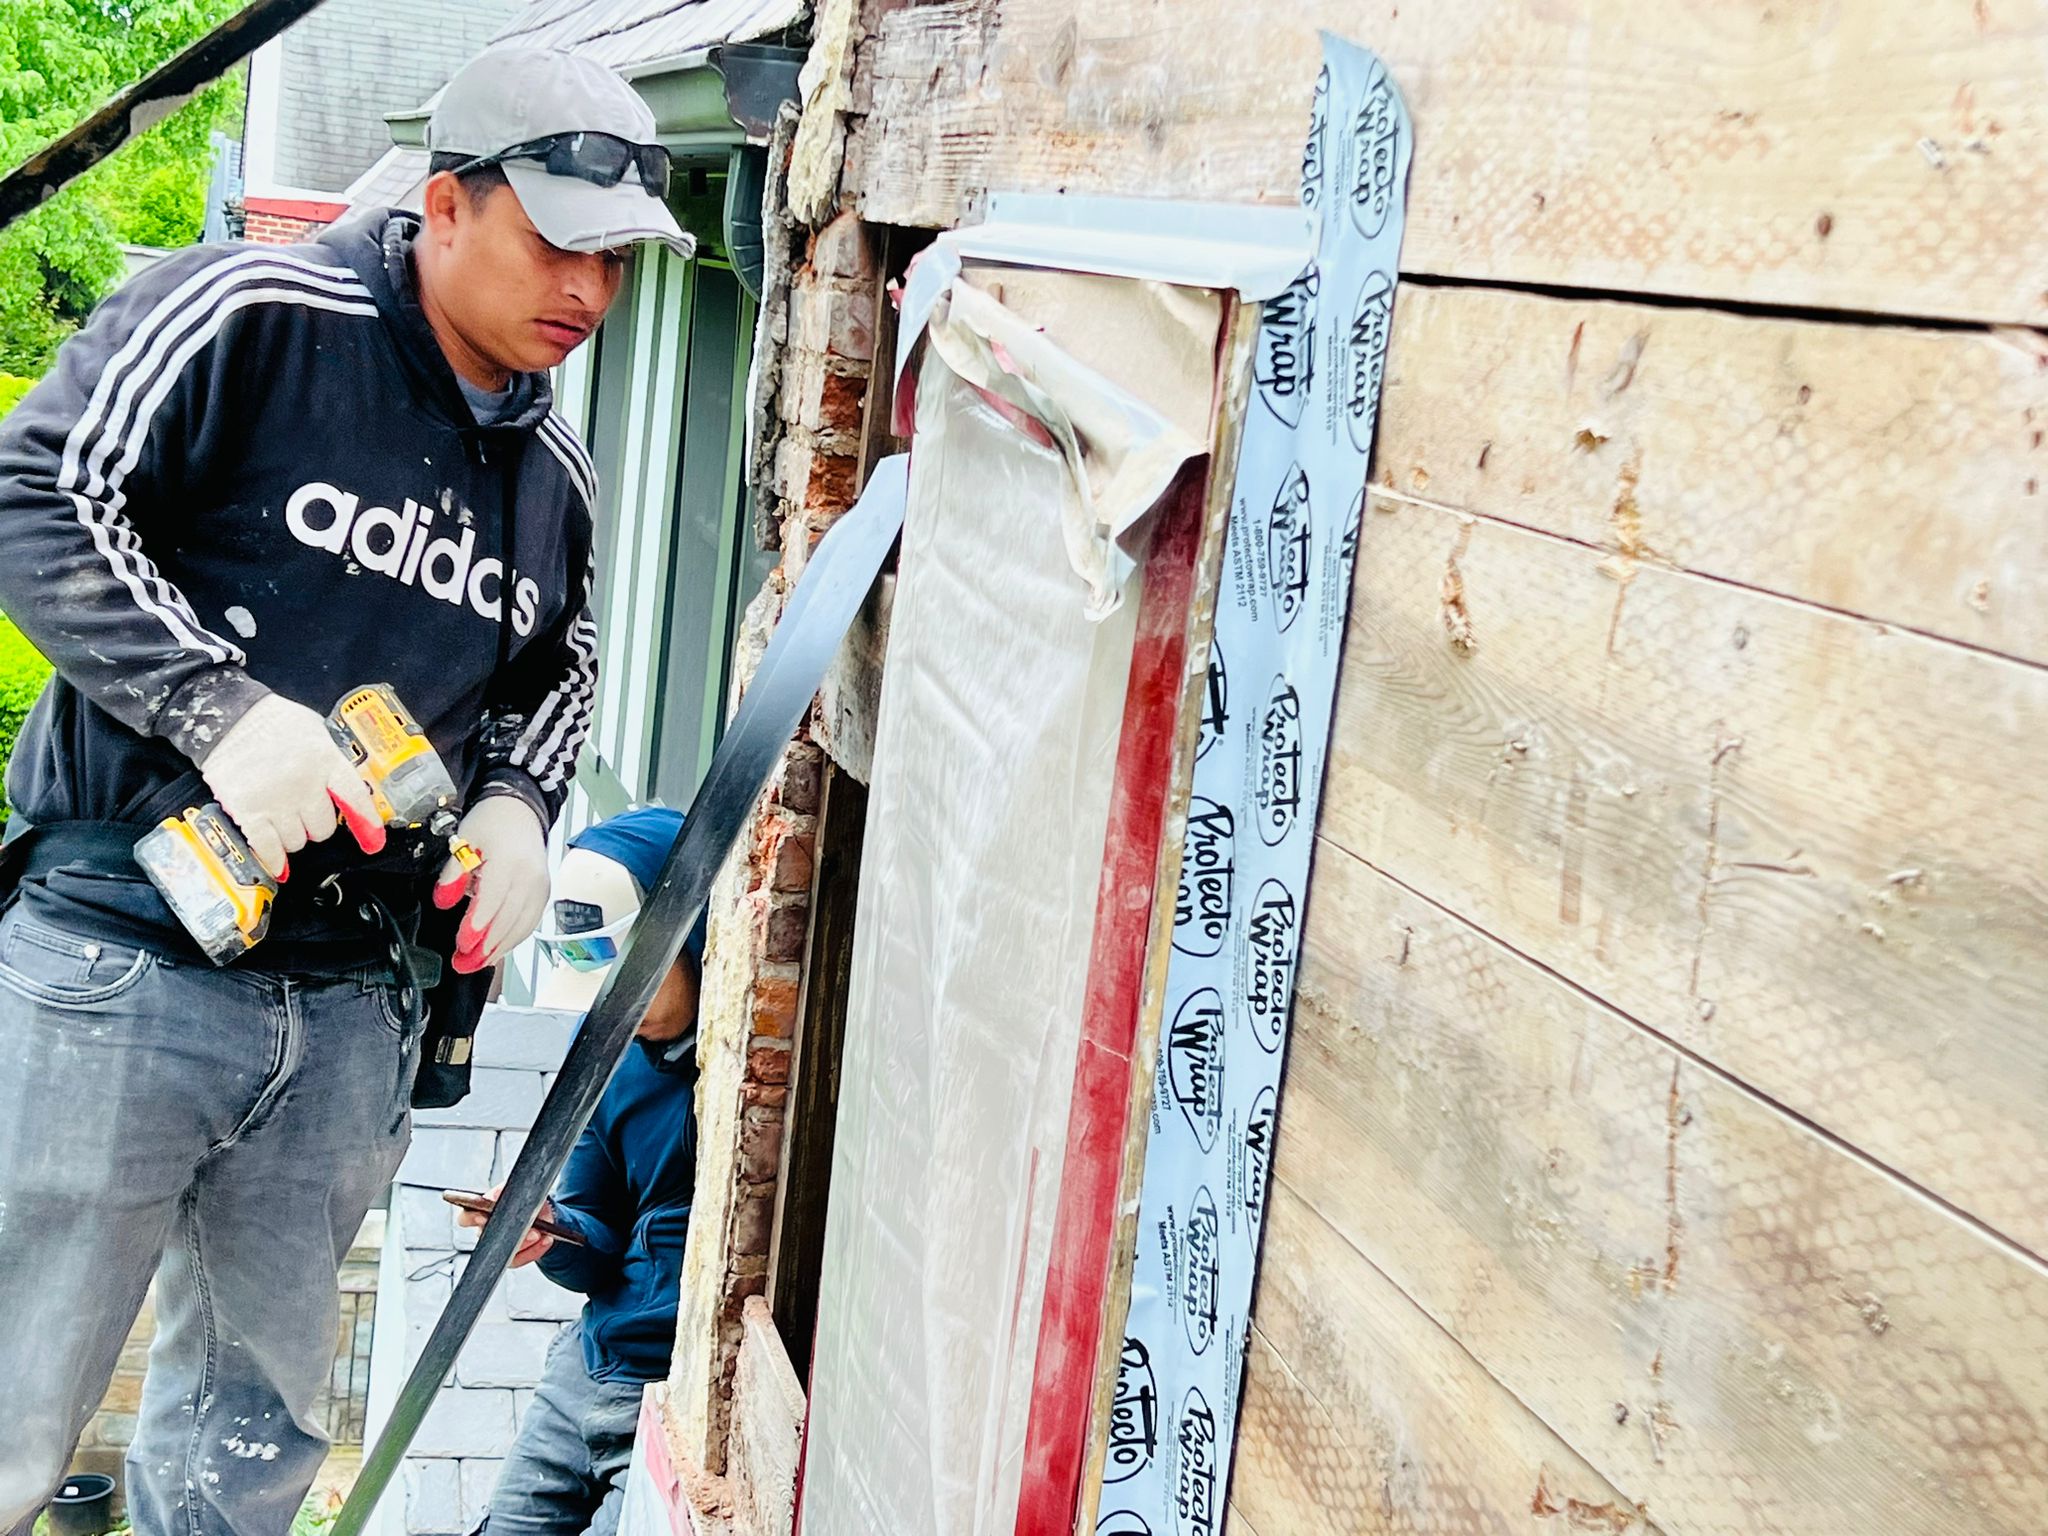
New flashing is angled down for water runoff, and bent down to cover the sides. Sides of windows are sealed with protecto wrap first.
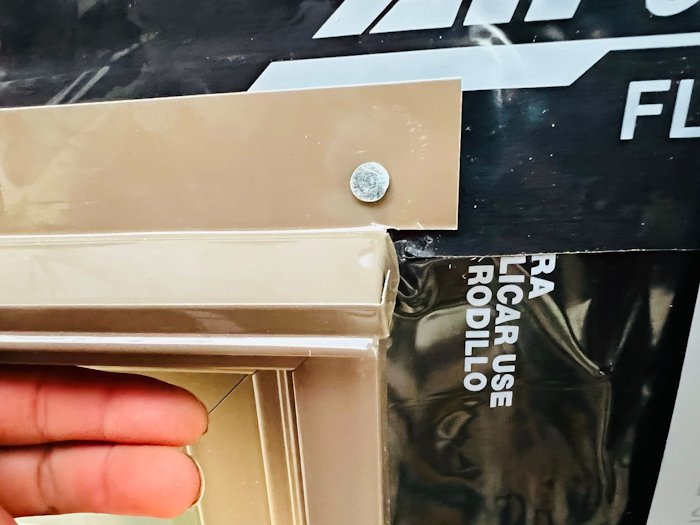
Flashing is cut a little long and bent down to cover the ends.
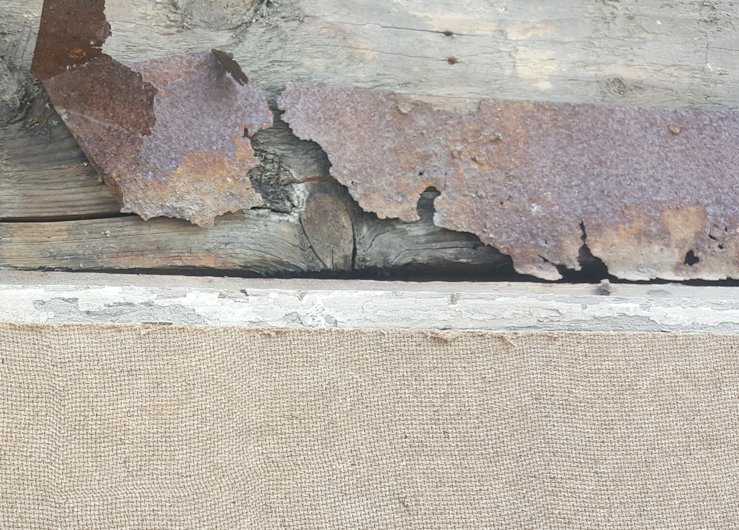
Old steel flashing from 1921 rusted through, damaging the wall.
Crummy coping.
Coping is the three sided flashing on the top of a parapet wall.
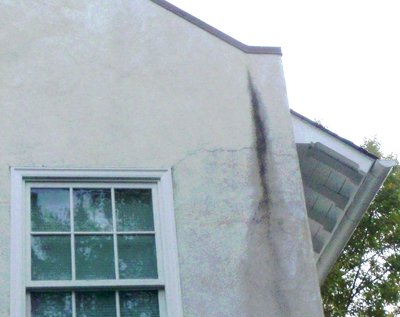
4 years after we finished this addition in Alexandria, the crummy coping caused a catastrophe. More details here.
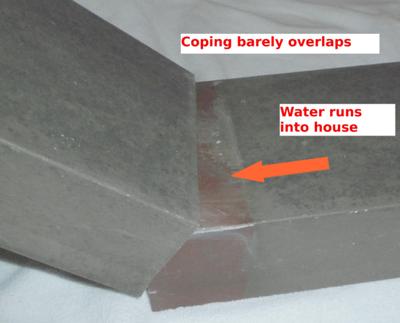
The coping is a large water funnel. The company that put on this coping told the homeowner that the stucco was poorly done and this isn't their fault.
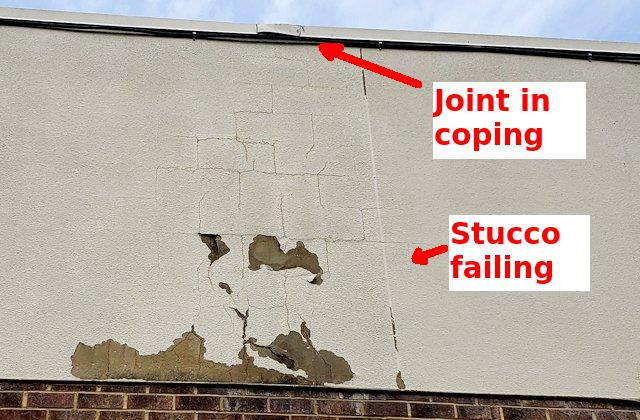
I got a bid invitation to fix the stucco. I can't do the stucco unless the coping is replaced. More details here.
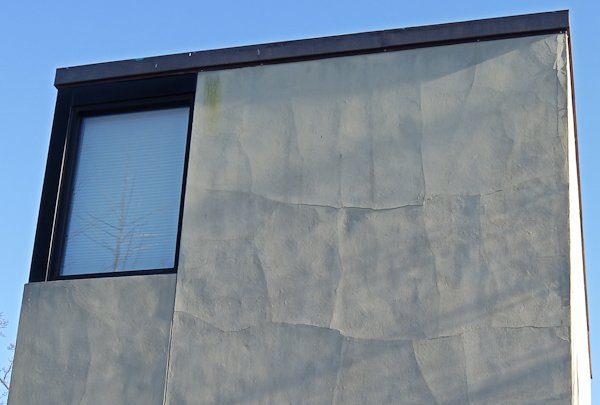
The stucco was very well done on this modernistic house in Arlington, Virginia. This is what it looks like after the coping has been leaking 17 years. We cut a hole in the wall and the plywood sheathing is wet.
Thanks so much dear readers, for reading all these years, and for all the comments.